INFO 5001 Application Modeling and Design - Instructions & Guides
GitHub Classroom Guide for INFO5001
What is GitHub Classroom? 🎓
GitHub Classroom is a teaching tool that allows instructors to distribute coding assignments, provide feedback, and manage submissions through GitHub. It automates repository creation, access control, and provides a streamlined workflow for programming courses.
Benefits of GitHub Classroom 🌟
- Automated Setup: Easily access assignments through a single link
- Real-world Skills: Learn Git and GitHub, the same tools used by professional developers
- Immediate Feedback: See build errors and instructor comments directly in code
- Portfolio Building: Build a collection of projects visible to potential employers
- Collaboration: Learn to work with others using professional tools
Getting Started with GitHub Classroom 🚀
Prerequisites
- ✅ GitHub account (created in Step 1 of main setup guide)
- ✅ Git installed on your computer (Step 5 of main setup guide)
- ✅ VS Code with GitHub Classroom extension installed (Step 6 of main setup guide)
Accepting Assignments
Steps for Accepting Your First Assignment
-
Access the Invitation Link
- You’ll receive assignment links via Canvas announcements or email
- Click the link to open the GitHub Classroom assignment page
-
Join the Classroom
- If this is your first assignment, you’ll be asked to join the classroom
- Select your name from the roster to link your GitHub account

-
Accept the Assignment ✅
- Click the “Accept this assignment” button
- GitHub Classroom will create a personal copy (repository) of the assignment for you

-
Wait for Repository Creation ⏳
- GitHub will automatically create your assignment repository
- When ready, you’ll see a link to your new repository

-
Open the Repository 🔗
- Click on the link to open your personal assignment repository
- This is where you’ll work on your assignment
Working on Assignments Locally
Cloning Your Assignment Repository
-
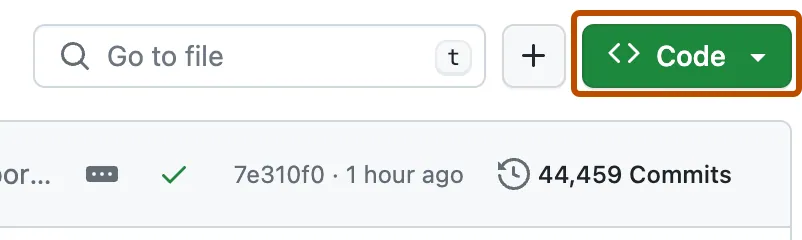
Copy Repository URL
- On your assignment repository page, click the green “Code” button
- Copy the HTTPS URL
-
Clone in VS Code
- Open VS Code
- Press
Ctrl+Shift+P(Windows/Linux) orCmd+Shift+P(Mac) to open Command Palette - Type “Git: Clone” and select it
- Paste the repository URL and select a local folder to store the project
OR
Clone using Terminal 💻
git clone https://github.com/classroom-org/assignment-your-username.git cd assignment-your-username code . # Opens the project in VS Code -
Open the Project
- VS Code will open the cloned repository
- You can now see all the assignment files and start working
Completing and Submitting Assignments 📤
The Git Workflow for Assignments
-
Make Changes to Code
- Implement your solution in the provided files
- Create new files if needed
-
Save Your Changes 💾
- Save your files in VS Code (
Ctrl+SorCmd+S)
- Save your files in VS Code (
-
Stage Your Changes ➕
- In VS Code, open the Source Control panel (click the branch icon in the sidebar)
- Click the “+” next to modified files to stage them
OR using Terminal:
git add . # Stages all changes -
Commit Your Changes
- Write a meaningful commit message (e.g., “Implemented factorial function”)
- Click the checkmark icon to commit
OR using Terminal:
git commit -m "Implemented factorial function" -
Push to GitHub
- Click the “…” in the Source Control panel and select “Push”
- OR click on the sync icon in the status bar
OR using Terminal:
git push origin main -
Verify Submission
- Visit your GitHub repository page to confirm your changes are visible
- Check for any automated feedback or tests that have run
Best Practices for GitHub Classroom 🌟
Do’s ✅
- Commit Frequently 🕒: Make small, frequent commits with clear messages
- Keep Your Repository Clean 🧹: Don’t commit unnecessary files like compiled binaries
- Read Assignment Instructions Carefully 📖: Check the README.md file for requirements
- Start Early ⏰: Don’t wait until the last minute to begin assignments
- Ask for Help 🙋♂️: Use class discussions to ask questions if you’re stuck
Don’ts ❌
- Don’t Share Your Repository: Your assignment repo should remain private
- Don’t Wait Until the Deadline: Push your work regularly, not just at the last minute
- Don’t Ignore Automated Feedback: Check for automated tests and fix failures
- Don’t Commit Credentials: Never push API keys or passwords to GitHub
- Don’t Make a Single Giant Commit: Break your work into logical, smaller commits
Troubleshooting GitHub Classroom
Common Issues and Solutions
-
Authentication Failed:
- Use a personal access token instead of password
- Create one at GitHub > Settings > Developer Settings > Personal Access Tokens
-
Cannot Push Changes:
- Ensure you’ve committed your changes first
- Check if you have write access to the repository
- Try
git pullfirst to sync with remote changes
-
Assignment Link Not Working:
- Make sure you’re logged into GitHub
- Check if the assignment deadline has passed
- Contact your instructor for help
-
Repository Not Showing in VS Code:
- Try refreshing the GitHub Classroom extension
- Clone the repository manually using the terminal
Additional Resources
- GitHub Skills 🎮
- Pro Git Book (free online) 📗
- Markdown Guide for README files 📝
Remember: GitHub is not just a tool for this class—it’s an industry-standard platform that will benefit your career. Learning it well now will pay dividends later! 💯